Archive for the ‘Sewing’ Category

Nathan’s jeans


13 Oct

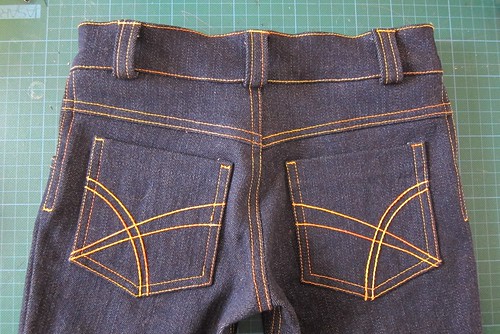
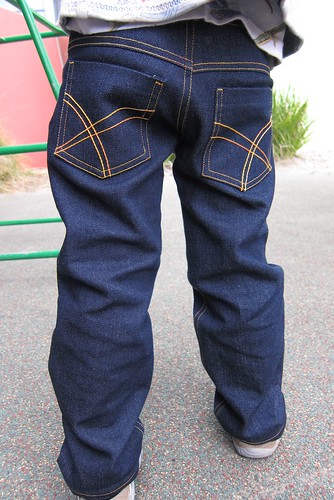
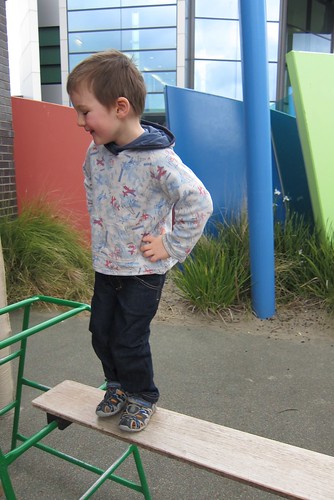
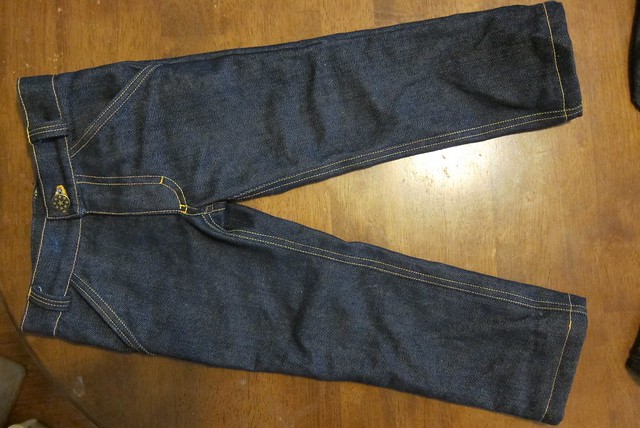
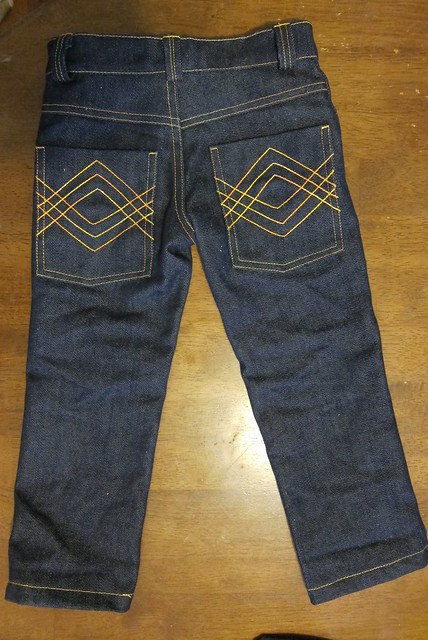
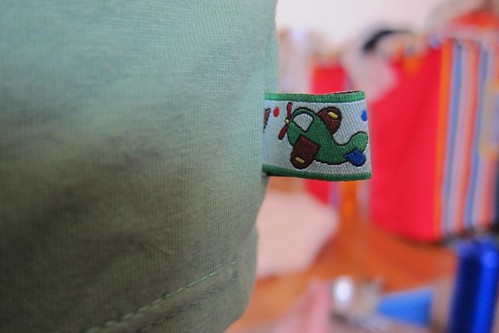
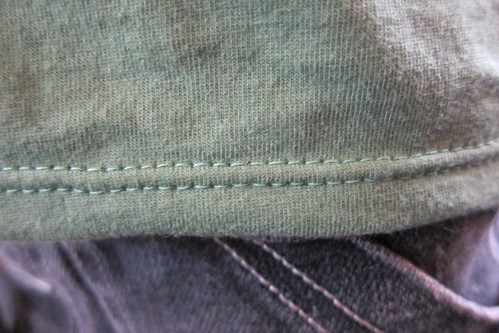
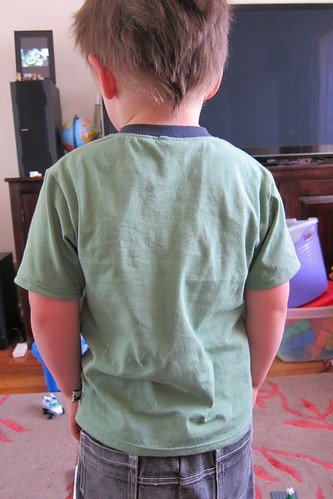
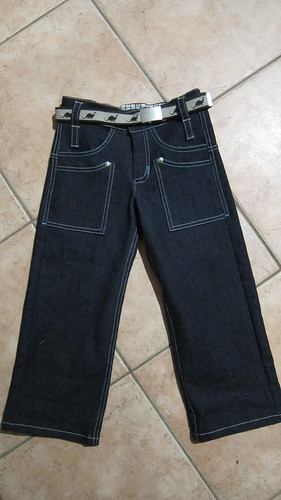
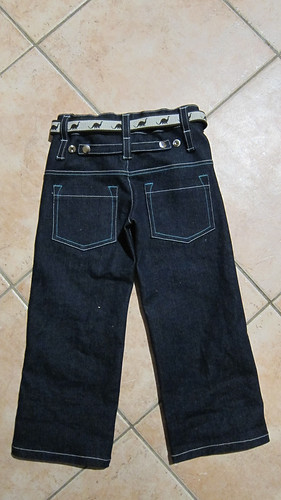
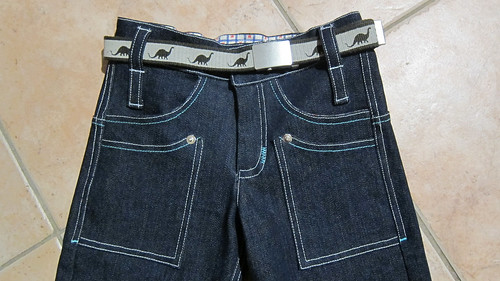
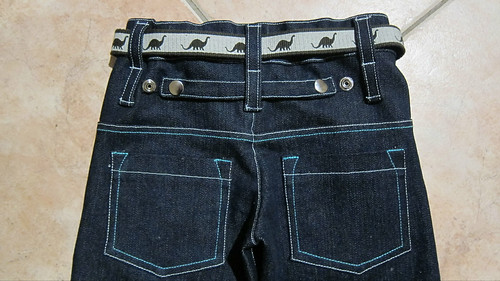
I have made Nathan some jeans now too, but I drafted the pattern for these so I wasn’t sure how well they would work. I am so very pleased with he they turned out. The pattern on the pockets was done using my Coverstitch machine and there were no sharp turns and I think it worked really well.

Last Import-2

Last Import-0

Last Import-5

Last Import-7

Toby’s Jeans


08 Oct

Today I finished some new jeans for Toby. They are an Ottobre Design pattern (Issue 4/2012, #21), and were described as ‘narrow’. They certainly are narrow, and I’m glad that I didn’t cut any out for Nathan because this is not a pattern that would work for him. I made size 92 for Toby, and they fit him really well.

I had a play with my coverstitch machine for the details on the back pockets. I’m reasonably happy with how it turned out, but I think it would look better if there were no points where lines change direction. I’m also thinking that I should have added some elastic to the waist, but after Toby wore them all day today without them ending up at his knees, I’m hoping we can get away without a belt (which would just make them too hard to get on and off by himself for toileting). All in all I’m pretty happy with them, and I think Toby is too. 🙂

Last Import-13

Last Import-14

Last Import-12

Hooded jumper


25 Apr

I made a hooded jumper for Toby recently, drafting the pattern by following the instructions from a pattern making book that I have been using. I need to make a few adjustments for next time….I need to lengthen it a bit, take some width off it, and make the neck opening smaller. However, considering I have never sewn anything like this before and had to work out how to put it together, I’m really pleased with it. 🙂

Last Import-0

Last Import-1

Unless….


01 Feb

_MG_8544-3

….someone like you cares a whole awful lot, nothing is going to get better, it’s not.
Dr. Seuss from The Lorax

The Lorax has to be one of our favourite Dr. Seuss books (there are many that we love). It is a tale of greed, non-sustainability, and lack of concern for our environment, with the beautiful lilting rhymes that Dr. Seuss can do (and it doesn’t have tooooo many made up words that an make some of his books a hard read). So I guess it was inevitable that when we saw a bolt of Lorax fabric a couple of months ago, Nathan snatched it up and took it to the counter for cutting. He was adamant that I make him a hat out of it, and it had to have the Lorax fabric on the outside AND inside.

I made the boy a hat…almost to his specifications. There is a contrasting fabric inside but not on the brim. I also made him a matching backpack for kinder (preschool), because his old backpack is too small to fit all the things he needs to take. I was rewarded with huge smiles when I unveiled the hat and backpack, and they had to be tested out immediately. In fact, they have barely been off him, and he has been practicing putting his lunch in it using the wooden and felt foods that the kids have.

We took some photos in our overgrown garden with the tomatoes we had picked that day. Don’t ask me why some of the poses were necessary, I was just told to photograph them. There seems to be some excitement about starting kinder now, whereas until now I think he has been a little scared. 0nly a few days to go.

_MG_8540-1

_MG_8553-6

_MG_8559-9

_MG_8560-10

T-shirt from scratch


31 Dec

Last Import-70

I made Nathan a T-shirt! Ok, so I have made t-shirts before, so you may ask….what is the big deal?

This time I didn’t start off with a pattern. Instead, I started off with a little bit of knowledge acquired from the pattern making course I did in July and instructions for a basic, close-fitting t-shirt from Winifred Aldrich’s book ‘metric pattern making for children’s wear and babywear’.

I made a few little adjustments to the pattern after following the instructions, and I probably have a couple more to do before I am completely happy. I made the t-shirt out of 100% cotton jersey (fabric made in Australia). I generally make Nathan’s t-shirts out of stretchy jersey (cotton with 10% lycra) so they will be as comfortable as possible, but this time I wanted to see how the garment would fit without the stretch (stretchy fabrics are more forgiving with respect to fit). I was a little concerned that the neck opening would be too small, even though I made it bigger than instructed, but it fits over Nathan’s big head without a problem. I was nervous about drafting a sleeve even with instructions, but I really like how the sleeves turned out (and I even made a slight adjustment to the curve).

All-in-all, I am really happy with the t-shirt, and I have just a little more confidence that I will be able to come up with some clothing patterns for Wispy Threads. Most packaged patterns cannot be used for commercial purposes and, anyway, I wanted to have a go at making the pattern as well as the clothing.

Last Import-1
The instructions in the book look like this.

Last Import-71
A little bit of ribbon to make a plain t-shirt slightly more interesting

Last Import-87
I’m slowly getter better at using the Coverstitch machine

All Imported-392

Last Import-81

Last Import-93

Nathan’s new hat


26 Sep

Last Import-4

I bought a kid’s hat pattern from Nicole Mallalieu Design almost two years ago. When I was at a craft and quilting expo a few months ago (very little was of any interest to me), I saw that there was a Nicole Mallalieu Design stand, so I dropped in to ask my burning question regarding their hat pattern…..what sort of interfacing did they recommend? I left the stand with one metre of a medium-heavy woven and fusible interfacing and promises to myself to try out that pattern.

Well, I finally got around to trying it out…pretty much out of necessity since Nathan’s old sunhat no longer fits him and we are getting that time of year when sun hats are essential. It was a little fiddly, but overall pretty easy to do as long as care was taken along the way. I chose to use the second-smallest brim size, but then I added a 1 cm seam allowance to the outer edge to adjust for the fact that didn’t want to use a bias binding on the edge. You also had to choose whether to cut the fabric on the straight grain or the bias, and I chose the bias. I think this was the wrong decision for the pattern I used. Overall, though, I’m really happy with it, and will hopefully get a modeled photo of it tomorrow.

I’m thinking that this might be a good Christmas gift for the kids in our lives that we normally give gifts to. You can’t have too many sun hats, can you?

Last Import-2

Last Import-3

image.jpeg

Nathan’s new jeans


09 Aug

Last Import-12 Last Import-14

I finished these jeans for Nathan a few days ago. I wasn’t sure if the bling in the back would look silly on a little boy, but it is ok. The pattern is from Ottobre 1/2010, and I made size 104 even though he is 98 cm tall. Some other pants that I made for him in size 98 are getting a bit small, so decided to go the next size up (and hopefully, being denim, they would last a couple of seasons…unlike the cord pants I made him that last just a few months before holes appeared in the knees). Anyway, the combination of the pants being a size too large and the denim being slightly stretchy means that the pants are enormous on him. I tried adding a bit of elastic in the back of the waist, but it wasn’t enough. We ended up getting him a belt from Cotton On Kids to keep his pants up.

The pants took me at least a couple of weeks worth of stolen moments and nights. I got soooo frustrated with my machine, skipping stitches when top stitching over seams that were so very bulky. I have since found out that there is a simple solution to help with this problem. I got the studs put on near the pockets by a little shop in Brunswick, but they charged me $5 for them both which isn’t a lot of money really, considering they had to stop what they were doing and set up a different machine, but in Sydney it would have only cost me $2 so it felt like a bit of a rip off. 😀

I also decided to get a metal zip so the pants would be more…jeansy, if that is a word, but I couldn’t find a 9 cm one required by the pattern, so I ended up with a 12 cm zip. I normally cut down the dress zips for the boys pants, and it did occur to me that I would not be able to cut the metal zip but decided to try it anyway. Well, I won’t do that again! I had to hand stitch some of the top stitching at the bottom of the fly because I couldn’t sew through the zip. I had other issues with the pants too (I have a new rule not to cut anything after 10 pm), but I think that they turned out ok in the end. Nathan likes them, and that’s all that matters really.

Me, well I’m just happy they are finished. Finally.

Last Import-13

Last Import-15

Baby gift finished


28 Jul

Baby gift

I finally got the top and shorts finished for baby Thomas who is now more than two months old. So I guess it is a good thing I have made size 68, which I assume should fit at around 6 months old.

Sewing


07 Jul

All Imported-1032

My latest creation is a long sleeve t-shirt for Nathan. I recently made myself a long sleeve top out of the same stripy fabric, and Nathan wanted one the same (now he wants us to wear our tops at the same time so that we match!!). I made his and then decided it needed something on the front. Nathan requested a car appliqué, so I used one from an Ottobre magazine and tried sewing it on with a stretch stitch that does two stitches forwards and one backwards, thus making the sewn line thicker and more noticeable. I had never done it like that before, and it took me a while to work out the best place to turn….it ended up being after the first forward stitch, which is quite logical if I had stopped to think about it. I decided it was too hard to do this stitch on really tight curves, so I just did normal stitching around the windows and the inner circles of the wheels.

I’ve discovered that I quite like sewing, but I am definitely no seamstress. I can carefully follow a pattern so that it works, but when it comes to making any adjustments I am totally lost. I remember making clothes when I was a teenager, and got really frustrated if something didn’t work because the sizing didn’t fit me perfectly. The kids are pretty much a perfect shape, so there is little, if any, adjustment needed with the patterns I am using, though Toby is a bit on the skinny side and I foresee some changes to patterns in my future for him. I think I am certainly capable of making a t-shirt skinnier for my little boy, for example, but I am still lothe to make anything for myself.

To get some more confidence in making adjustments to patterns when sewing for both myself and the kids, I have decided to do a pattern making course at CAE. I have chosen a course that is run on two Sundays for 6.5 hours each day. It will be the first time I will be voluntarily away from Toby for more than an hour (or however long he was with Andrew and Nathan on some short walks they have done together), and only the second time we have been separated (the first being when i was in hospital having surgery on my toe). So doing this course is going to be a big deal for all of us, with Andrew having to cope with toileting, sleep time, and the two kids on his own, Toby who will have to cope without me for a day (he is very much a Mummy boy when tired or upset), and Nathan….well, he just loves being with his Daddy so he will have a ball no matter what happens.

Last Import-4

Gifts


30 Jun

Last Import-37

We were invited to a little boy’s first birthday, so I decided to haul out the pattern for the jumper I had put away because Toby has three tops made with the pattern, and make one the same size because it fits Toby perfectly at 18 months old and figured that it should last a 1 year old for a while. It is sized 80 cm, and Toby is almost that tall now. I made the top with the cotton French Terry with 5% Lycra that I love but had trouble sewing last time. I have done some research on sewing stretchy fabrics and found that using my walking foot may give a better result. I put my faith into my walking foot and forged ahead. I used an animal print cotton interlock for the inside and made a giraffe appliqué to match the giraffe on the fabric. It was my first attempt at making up an appliqué, and I am pretty pleased with how it turned out. I was also happy with the hood since it did not stretch out of shape when I sewed the binding on this time. The walking foot seems to have helped a lot. I was very happy with the finished top, as was Toby who didn’t understand why he couldn’t wear it after I tried it on him to make sure that the neck opening was not too tight (as several of the earlier ones I made are a bit on the tight side going over the kids heads).

Last Import-36

Last Import-38

And I also made this apron for his 4 year old brother who’s birthday was one day earlier. The dinosaur appliqué came from Helping Little Hands and Little Lizard King.

Last Import-31

Last Import-33

I have one more gift to make for a friend who’s first son was born about a month ago
but, as I have never made the pattern and it has a neckline I have never done before, I am just procrastinating a little with it. Photos will be posted when it is done.

Cork’s Corner

My little corner of the internet